Wednesday, August 1, 2018

ማስሊያ: The Amharic Calculator V2 QnA

I have updated my Amharic Calculator app, and it is now available here. Feel free to download it and leave a comment on how I could improve it. Criticism is always welcome!


Screenshot Image
Screenshot of app in landscape mode (with numbers).

App Technical Information:


Q: What platform was used to create the app?

A: The coding platform used was Android Studio 3.1.3. Android Studio is an application made to help developers create and release apps on mobile. The primary languages used for coding are XML for the UI (User Interface) and Java for the functionality. However, it is possible to import new languages to use.

Link to download the latest version of Android Studio: https://developer.android.com/studio/

Q: What language is the app programmed in?

A: I used Java for the functionality (calculations, storing numbers, etc), and XML to create the layout and display XML is very similar to HTML, only the tags are much more varied. I didn't use much XML directly, but instead used the UI to drag and drop elements onto the test screen, only using XML for customization. I learned how to use these languages with Android Studio with this video series: https://www.youtube.com/playlist?list=PL6gx4Cwl9DGBsvRxJJOzG4r4k_zLKrnxl

Q: What device will work with the app?

A: Theoretically, any Android phone should work with the app. However, as one of the characters on the buttons is an image, the scaling of the character might be off on bigger or smaller devices (such as tablets). The recommended size of device to use the app is from 4.5 to 5 inches diagonally (the screen only, not the entire device).

Q: What font/language was used for the app?

A: The language used for the characters is Amharic, also known as Ethiopic. Since Ethiopic characters are not included on the keyboard, I used the Unicode equivalent of those characters in order to write it out. Unicode is how developers and other people write characters not included on the keyboard without having to copy and paste it. An example of a Unicode key that represents a character is U+1206, which represents ሆ.

Link to the Unicode website I used: https://unicode-table.com/en/

Q: How did you decide what to name the app?

A: I decided to name the app ማስሊያ: The Amharic Calculator to accurately describe what it does. It is a calculator that can calculate in Amharic, and the translation for calculator in Amharic was ማስሊያ, so I decided to name it ማስሊያ: The Amharic Calculator.

Q: What is the recommended resolution for the app?

A: The recommended resolution is 2560 x 1440. However, it is possible to use the app at lower resolutions as well. The recommended aspect ratio is 16:9, so that it can fill the screen without any leftover space. Rounded screens, such as smart watches, or very large screens, such as smart TVs are not recommended.

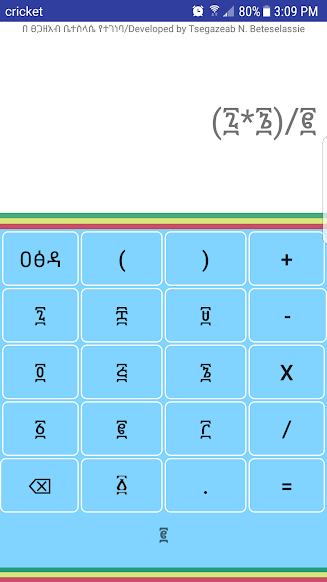
Q: How was the display of the app organized, and what does each part do?

A: The display was mainly organized using XML. At the top of the screen is where all the inputs and outputs are displayed. All the buttons are organized beneath it, including the number, operations, backspace, clear, and enter buttons. Underneath the buttons is where the previous answer is displayed, which can only be seen in portrait mode. If the phone is turned to landscape mode, the display and buttons will be shrunk a bit, and and to the left of them is a scrollable history, where all the answers are stored.


The below pictures are screenshots of the app in portrait mode with and without numbers.

Screenshot Image
Screenshot Image


Experience:

Q: What were some of the challenges faced in making the app?

A: In order to add the Amharic characters to the display, I had to redo how the calculator calculated. Since computers can only calculate using Hindu-Arabic numerals (1, 2, 3), I needed to make a "translator" to convert the Amharic number characters to numbers. That meant I had to get rid of all the display code and replace the numbers with Amharic characters. Another issue was that the "zero" button was not scaling properly on other devices, due to the fact that it is a custom image and images don't scale the same as regular characters. I researched in order to fix this issue, but was unable to.

Q: What solutions did you use to fix these problems?

A: To fix the display problem, I made a translator that converted Amharic numbers to numbers the computer can use. Also, since the calculator was based around English numbers, I got rid of all the variables that store the numbers and instead made them use Amharic for the entire time they were used. My attempt at fixing the scaling issue is to make several copies of the folders used to store the XML variable. Each folder is for different screen sizes, and therefore makes the calculator look smaller or bigger. However, I did not know how to actually make the app choose which file to use.

Q: What was some of the feedback given to you?

A: Below is some of the comments given to the previous version of my app. I used the feedback given to improve it:

"This is really interesting. It is functional, simple, and clean. I really like it. The theme also looks more Ethiopian. I can imagine the arduous task of mapping the actual numbers and the final result into their Geez equivalence. But it would be nice to have that in your next release. I have some minor suggestions, like replacing "ባዶ" by "ዐፅዳ" and renaming the app "መቀመሪያ" instead of "ካልኩሌተር". I am proud of you Tsegazeab (and your Dad should take some credit too)!"

"የመጀመሪያ ጥያቄ የመጣልኝ ዜሮ ቁጥር በ አማርኛም ሆነ በግእዝ እንዳለ ስለማላውቅ በምን እንደ ተካህኸው ማየት እና አፑ እንዴት እንደሚሰራ ማየት ነበር የተካኽው ፩ ሲሆን በትክክል ይሰራል ግን " አልቦ " የሚለው ቃል በግእዝ "ባዶ" የሚለውን ይተካል ባዶ ምንም ማለት ሲሆን "አልቦ" ግን ቁጥር በእንግሊዝኛ "ዜሮ " ሊሆን ይችላል የሚል አስተያየት አለኝ ልክ ከመሰለህ ተጠቀምበት። እግዚአብሔር ያሳድግህ ! ብራቮ ! I'M SO AMAZED BY YOUR HARD WORK ! CONGRATULATION !"

These are some of the reviews, while not offering advice, still thanked me for the application:

"This app is so amazing! I hope you don't mind if I tell all my friends how amazing my cousin"s app is! I AM SPEECHLESS! and (by the way, you created the first ethiopian zero!) CONGRATS!"

"Wow! He is a great inventor. I will show this to my kids. It is so easy to use. Congratulations."

"Great job Abuka. I think I shouldn't be surprised, coz I know how gifted you are. You just make me feel proud of you. Keep it up dear."

Wednesday, June 20, 2018

The Physics Simulator

Introduction/The Idea:

For my AP Physics End of Year project, we were asked to create something that shows our knowledge of our favorite physics topics. You could either make two short projects or one long project. The options for both were pretty much the same, but the amount of effort you put into it will determine whether it was a short project or a long one. The most chosen options were a teaching video, an engineering project, or experimental research. Since my favorite topic was kinematics and specifically projectile motion, I decided to make something that would show this while playing to my strengths. One of the other options that only a few people chose was to create a program that shows your knowledge using code. If you already had experience programming, then it would be considered a short project, However, my teacher said that if I put in a lot of work, then he would consider it a long project. Therefore, I decided to create a program on projectile motion.

After some thinking, I decided to create a projectile motion simulation that can calculate the distance traveled. I decided to do this instead of a simpler project because I had already experimented with creating canvas animations earlier in the year during my free time. I had ended up making a simple animation that dropped a square wherever you clicked on the canvas. I decided to build this into a full-fledged projectile simulation.

A Crash Course on Web Design:

The programming languages I used for the application were HTML, CSS, and Javascript. A good analogy to how these programming languages fit together to make web applications would be a person. HTML would be the actual "body" of the person. CSS would be the clothes they wear. Javascript would be the "brains" of the person. What HTML does, if you didn't already know, is that it gives the framework for your program. You use HTML to create buttons, text boxes, containers, and links. CSS, on the other had, is what is used to style the pages you made in HTML. Normal HTML pages are very basic and unaesthetic. CSS helps to position elements, change the color, size and borders they have, resize elements for different browsers, and generally give the website "style". Javascript gives the web page functionality. It tells the web page what to do when a button is pressed, or a picture is clicked, or when the page loads. This is what I used to animate my simulation.  I'll only go over the HTML and CSS  code briefly, as most of the work I did was in Javascript.


How It Works (the code):

The HTML in my project basically set up all the inputs and outputs I needed for my program. The inputs are what will be used to set properties for each projectile that is fired. These include buttons, textboxes, and dropdown menus. The output, of course, is the canvas itself. The CSS moved the different elements around to make it easier to work with, along with giving it a color scheme and overall making it look nicer. The Javascript is what animates the projectiles in the program. What this section will cover is mainly focused on this.

Basically, how it works is that when the page loads, several variables and arrays are created for the more important data that needs to be saved. A variable is a way to store data without having to write it all out. An array is a way to store data without having to manually make multiple variables. It's best to store data this way due to it being easier to make and fix. Imagine having to describe all the features of a person just to call them to you. It's much easier to just give that person a name and use that instead. The name represents the person, just as the variable represents the data. Once this is done, it automatically runs the program once, just to show the user what the simulation does. I'll get into how that works later. Whenever you press the go button, it uses the DOM (a way to access HTML elements with Javascript) to get all the values you set in the Settings tab and put them into variables. This is what the createObjectOnClick() function does. A function is basically a way to run the same code over and over without having to type it out. Think of the person example I gave for variables. Instead of having to describe the same properties every time you want the person to come, giving it a name and using that is easier. Only this time, instead of giving a name to a bunch of data, you are giving a name to a bunch of code.

Lines 1-13 are where I declare my global variables and arrays. 
Lines 213-237 are where I declare the variables for each property the projectile will have.
At the bottom, lines 310-312 push the variable properties into each created instance (or copy) of the object. Then that gets put into an array that has all the properties of the projectiles.
Now here comes the interesting part: how it's animated. Once the createObjectOnClick() function finishes putting the properties of the object into variables, it actually gives it to the object. Remember those variables and arrays that were declared when the page loaded? Among those is an array called allObjectsCreated, and it stores the Objects that are created whenever you press the go button. Notice how I capitalized the word "objects". That's because in Javascript, there are something called Objects, which are basically arrays that can store code as well as regular data, They are helpful for storing properties of whatever you want, such as color and size, as well as functions to run. In this case, the object stores all the properties createObjectOnClick() made. It also stores an update() function, which basically tells the object what to do based on whether it touched the ground or not. If it is not touching the ground, it will keep accelerating the object downwards based on the gravity value. If it is, and bouncing is turned on in settings, it will flip the velocity to a positive in order to make it go upward. This part of the function is run every 20 milliseconds, and runs for all the projectiles in the simulation. However, since there is only one object, then in order to be able to save for multiple properties, the keyword new has to be used in createObjectOnClick(). This basically makes a new object at runtime that stores the properties. This new object is put into an array, which is how you access each projectile. In this way, you can create many objects and not have the code break.
Lines 47-71 handle what happens when the projectile hits the ground.

Now this next part explains what you might have noticed earlier: how the code is actually made to run every 20 milliseconds. In order to do this, you have to use the setInterval(arg1, arg2) method. This is a default method in Javascript and makes whatever the code you write in arg1 repeat for however many milliseconds you put in arg2. You can put a function in arg1, which is what I did so I don't have to run a giant block of code within the parenthesis. Also, to make the function creatObjectOnClick() actually run once, all you have to do is declare it with parenthesis outside of where it is called. So you create the function like this (ignore the brackets): [ function foo() {//code} ] and call it like this[ foo() ].

Anyways, that is how the most important bits of my program work. Everything else deals with smaller issues such as creating a pop-up when certain conditions are met and looping through the array that holds the properties of all the objects.


Final Product:

My final product is a projectile motion simulator that calculates the distance it travels while helping you learn different facts about projectile motion in general. It's features include:

- projectile motion visuals

- customizable:
    -gravity
    -initial velocity
    -friction
    -projectile type
    -cliff height
    -launch angle

-projectile tracing (can be turned off)

-bouncing (can be turned off)

-sliding (can be turned off)

-wall bouncing (can be turned off)

-learning popups (can be turned off)

It is a valuable tool to teach students about projectile motion and kinematics while still being entertaining and fun to use.